In this Session we will see how we can develop a java program, run it on a virtual machine and debug it.
Building a development environment
Installing Eclipse
Browse to https://www.eclipse.org/ and download the Eclipse version that is suitable with your configuration. If the Java development kit is not installed on your coomputer, you may install it by following the instructions listed in this page: https://openjdk.java.net/install
Configuring a workspace shared with the VM
Warning: In this Section we consider that you configured the shared folder shown in Session 1
With Eclipse, create a new project inside the shared folder. For the sake of simplicity, let’s call it Helloworld. You should have a result close to the following screenshot:
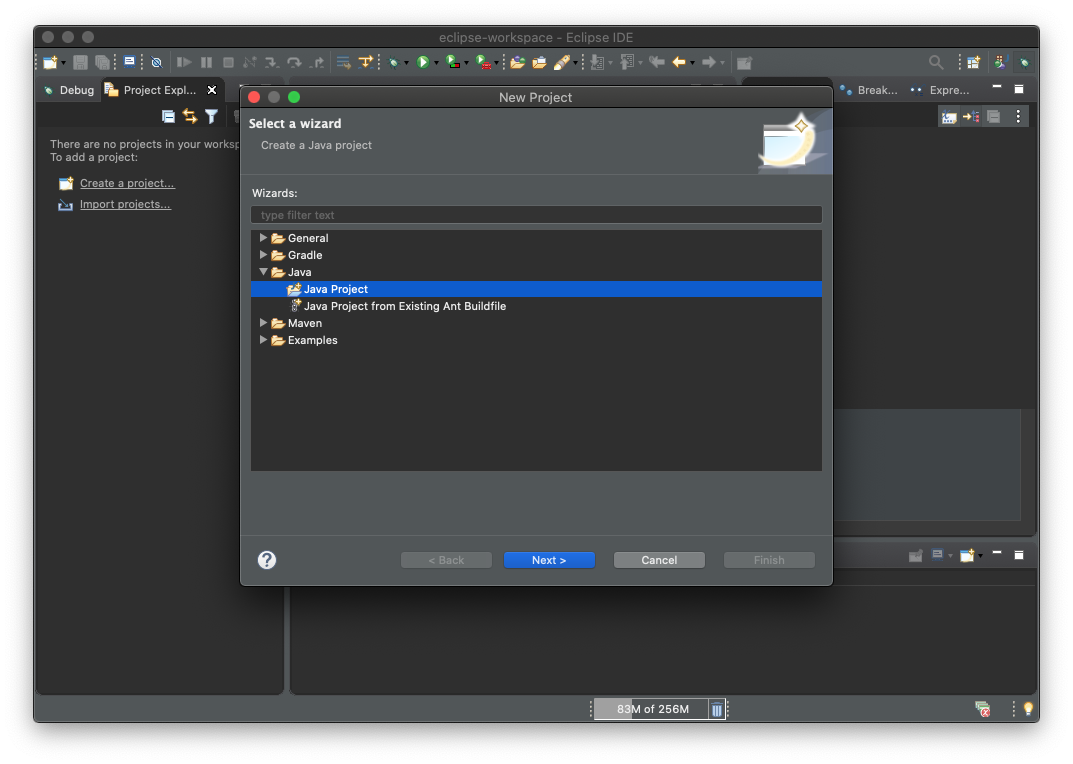
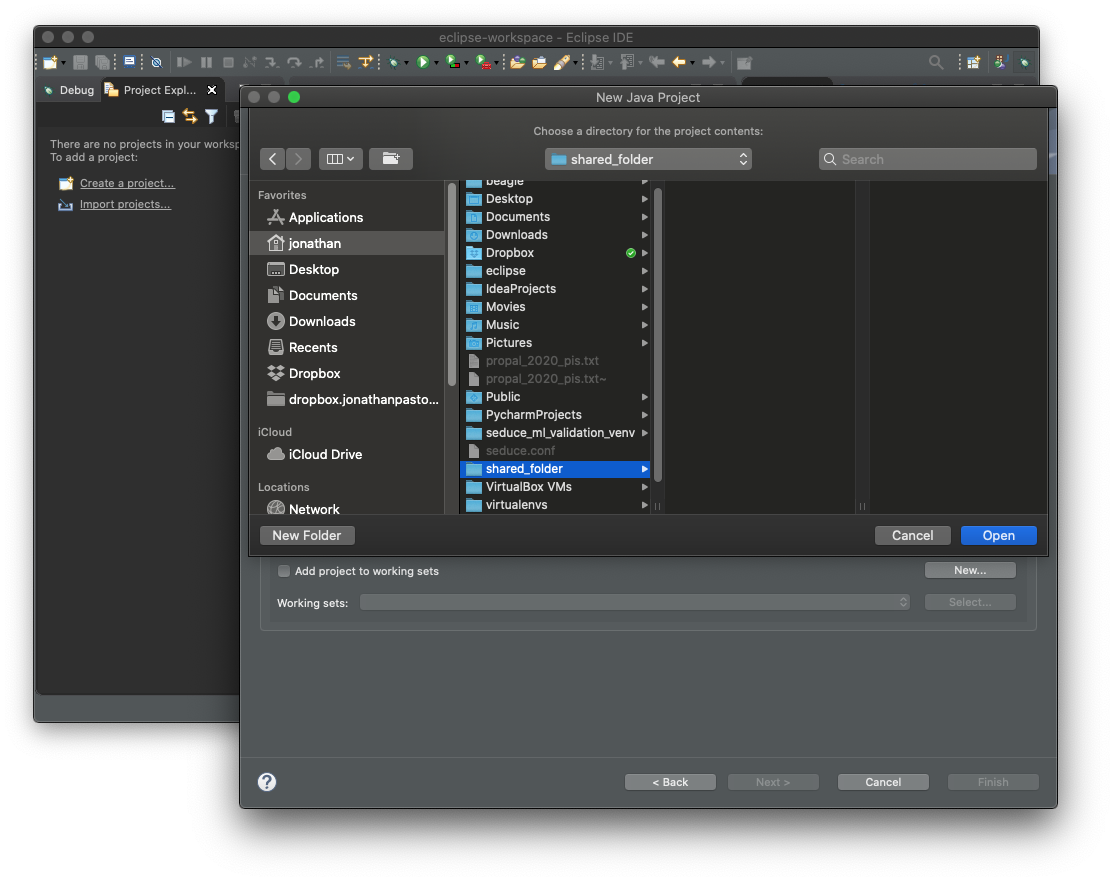
Creating an “Helloworld” project with eclipse
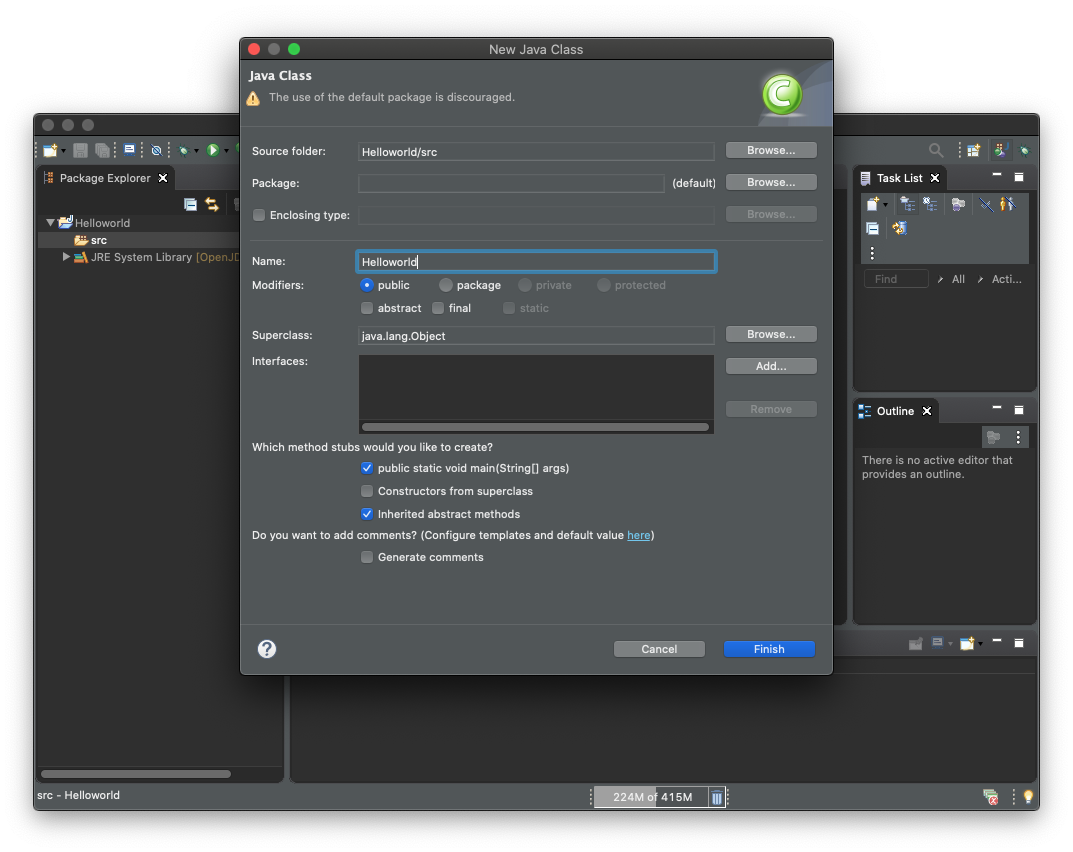
Create an Helloworld.java file with the following content:
public class Helloworld {
    public static void main(String[] args) {
        System.out.println("Helloworld!");
    }
}
You may run it directly from Eclipse and get the following output:
Hellworld!
Now, connect to your VM and run the following commands:
lowcomote@lowcomote-VirtualBox:~$ cd workspace/
lowcomote@lowcomote-VirtualBox:~/workspace$ ls
bin  src
lowcomote@lowcomote-VirtualBox:~/workspace$ java -classpath "bin/" Helloworld
Hellworld!
We will now launch the same program with debug options activated. This time java will wait for a debugger to connect to a network port, and then launch the program:
lowcomote@lowcomote-VirtualBox:~/workspace$ java -classpath "bin/" -agentlib:jdwp=transport=dt_socket,server=y,suspend=y,address=*:8000 Helloworld
Listening for transport dt_socket at address: 8000
Warning
You can get the ip address of the virtual machine by the running the following command in a terminal
lowcomote@lowcomote-VirtualBox:~/workspace$ ip a
1: lo: <LOOPBACK,UP,LOWER_UP> mtu 65536 qdisc noqueue state UNKNOWN group default qlen 1000
    link/loopback 00:00:00:00:00:00 brd 00:00:00:00:00:00
    inet 127.0.0.1/8 scope host lo
       valid_lft forever preferred_lft forever
    inet6 ::1/128 scope host
       valid_lft forever preferred_lft forever
2: enp0s3: <BROADCAST,MULTICAST,UP,LOWER_UP> mtu 1500 qdisc fq_codel state UP group default qlen 1000
    link/ether 08:00:27:aa:df:c4 brd ff:ff:ff:ff:ff:ff
    inet 192.168.1.172/24 brd 192.168.1.255 scope global dynamic noprefixroute enp0s3
       valid_lft 5978sec preferred_lft 5978sec
    inet6 fe80::7226:8b5c:fdc7:641c/64 scope link noprefixroute
       valid_lft forever preferred_lft forever
3: docker0: <NO-CARRIER,BROADCAST,MULTICAST,UP> mtu 1500 qdisc noqueue state DOWN group default
    link/ether 02:42:57:f7:cb:85 brd ff:ff:ff:ff:ff:ff
    inet 172.17.0.1/16 brd 172.17.255.255 scope global docker0
       valid_lft forever preferred_lft forever
In the previous case, the IP address of the virtual machine is 192.168.1.172
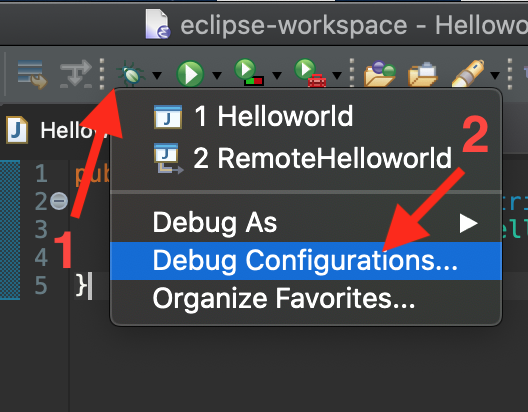
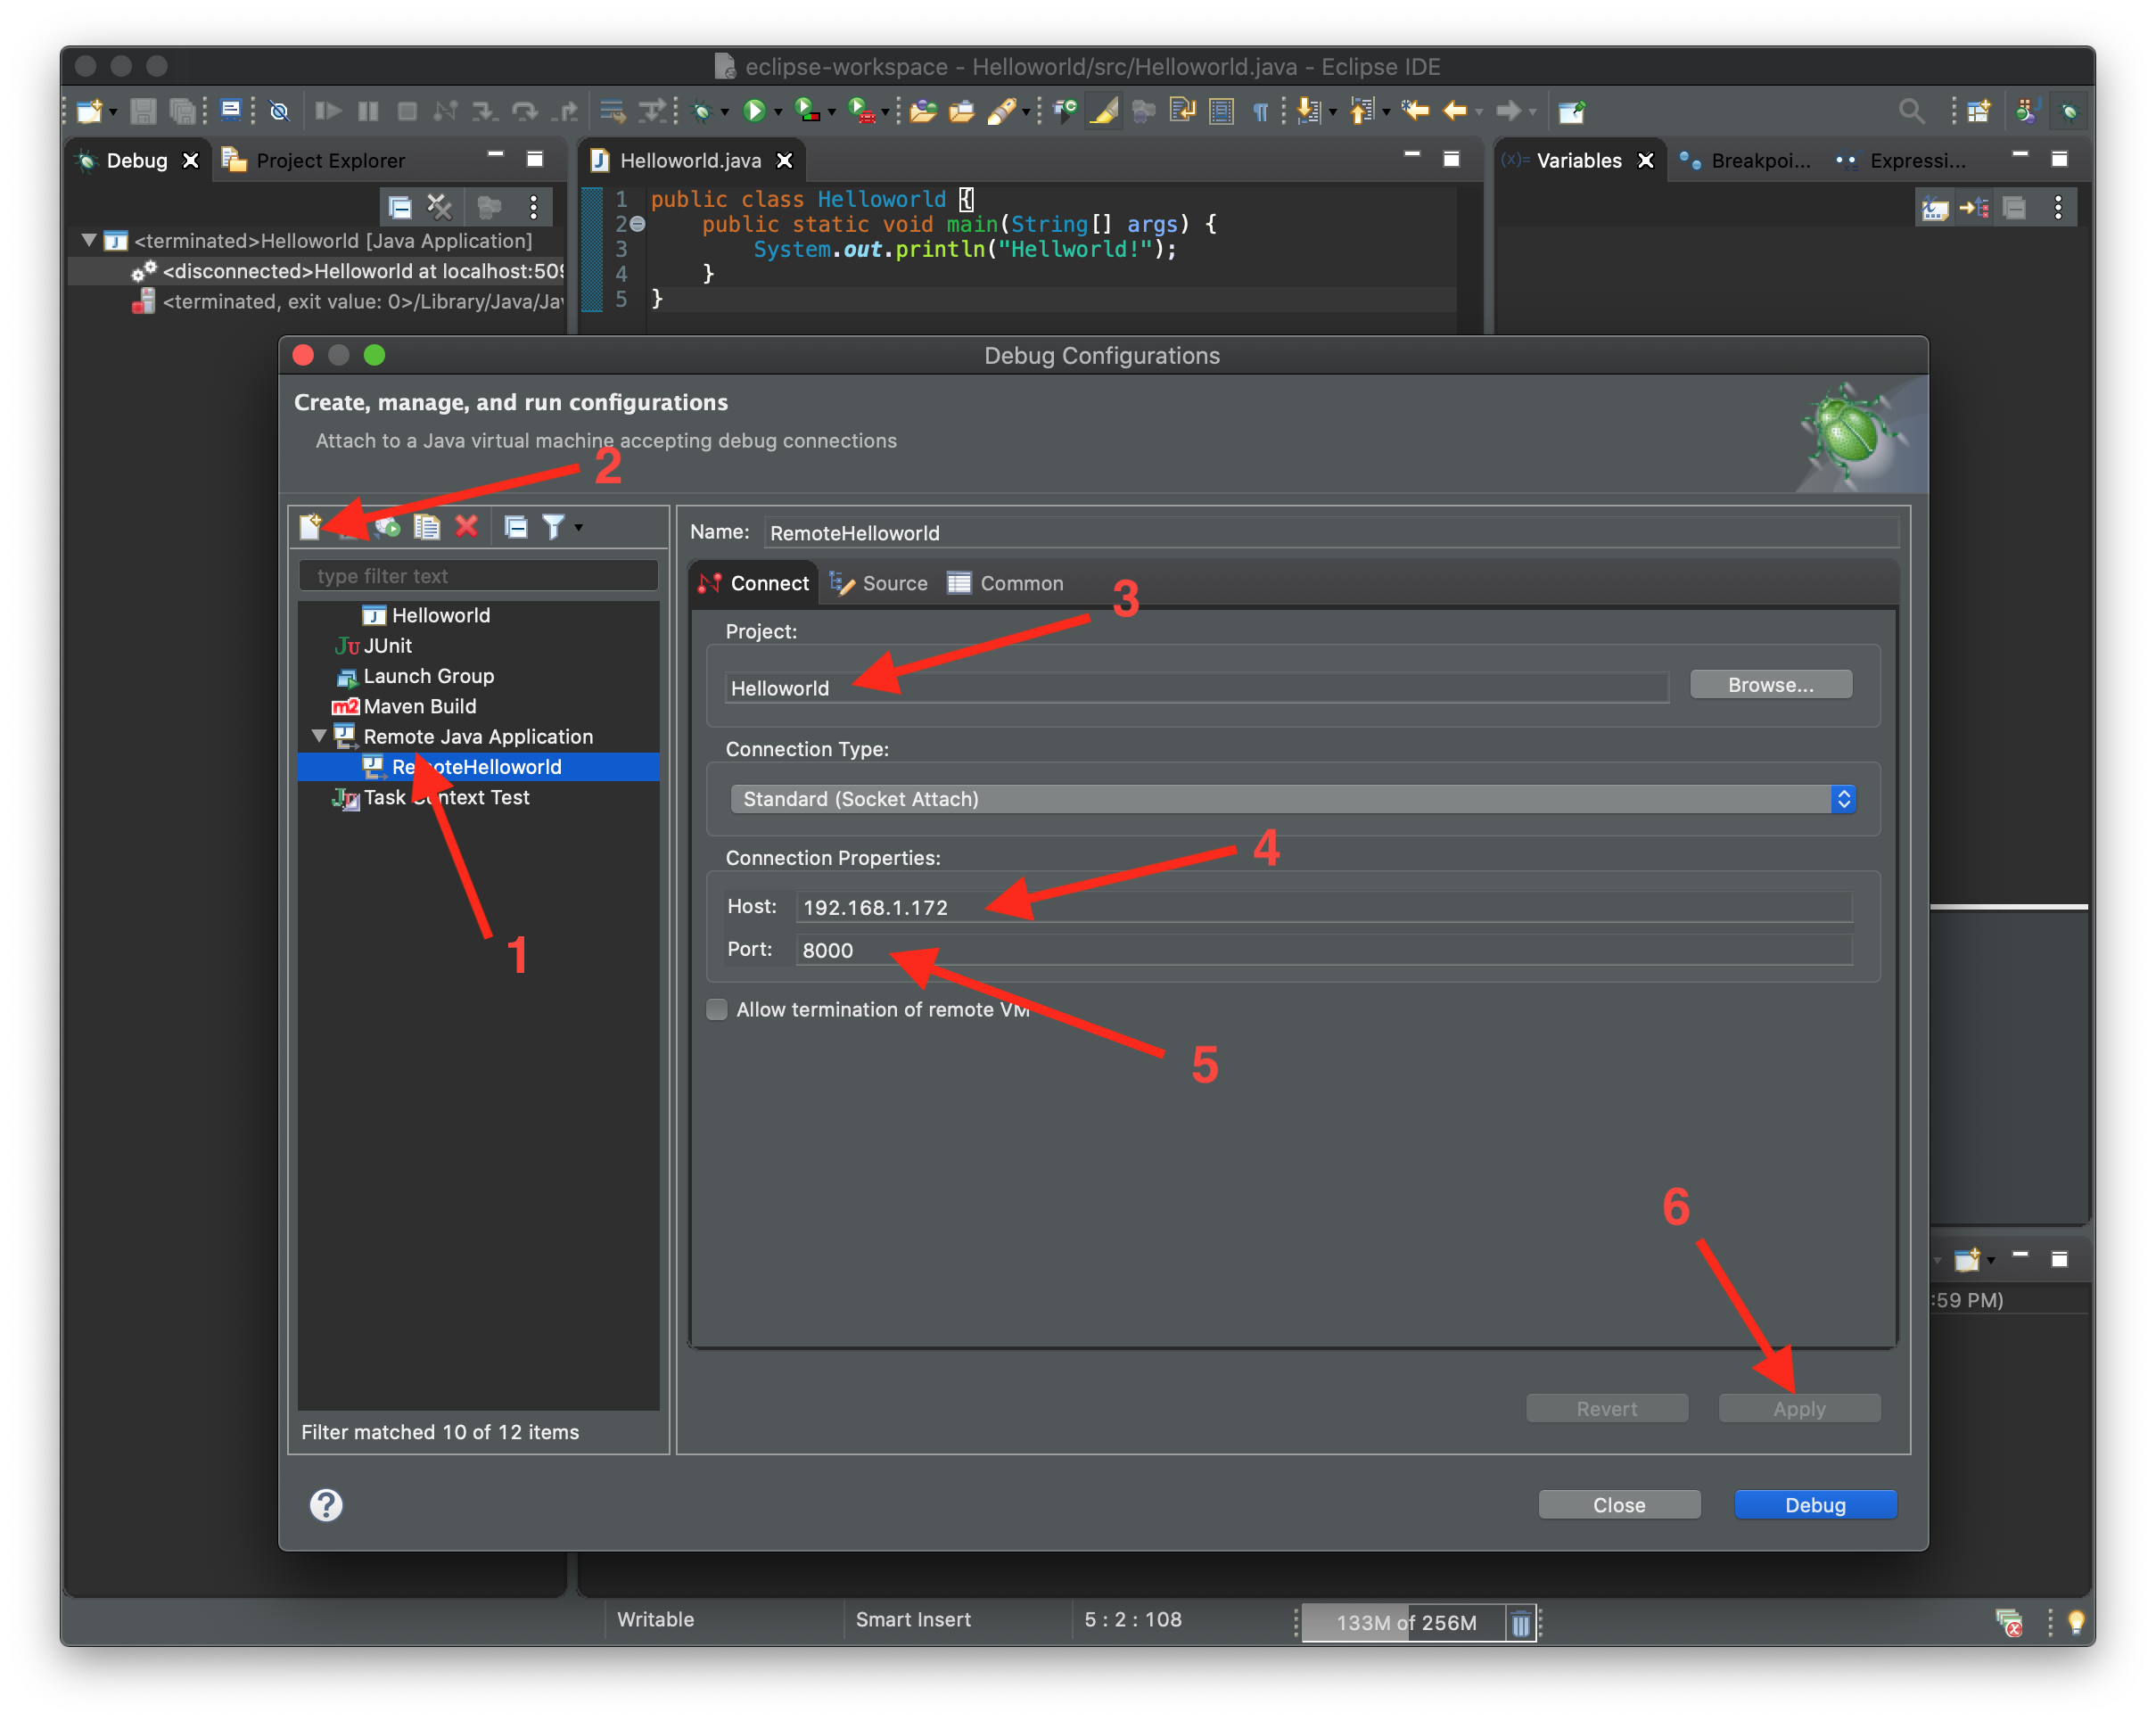
On eclipse, configure a new debug configuration as in the following screenshots:
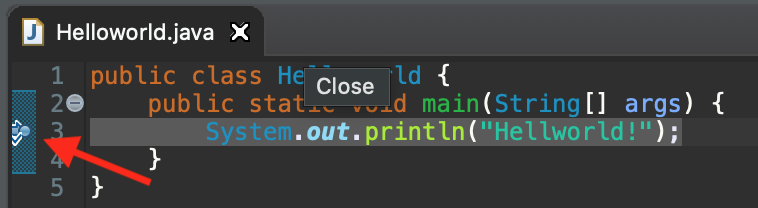
Double click in the left margin of the line containing the System.out.println("Helloworld!"); instruction:
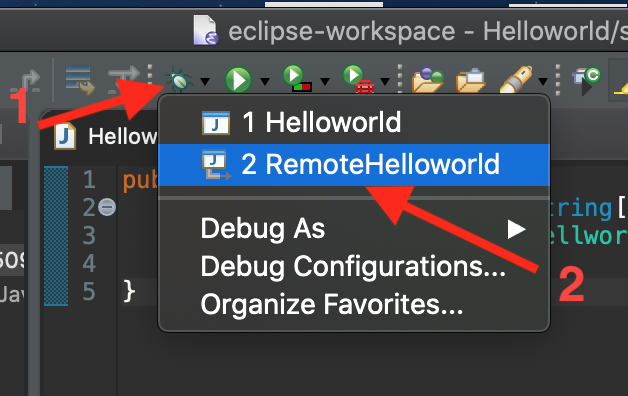
then run the debug configuration:
Execution is paused on the line where we put the breakpoint.
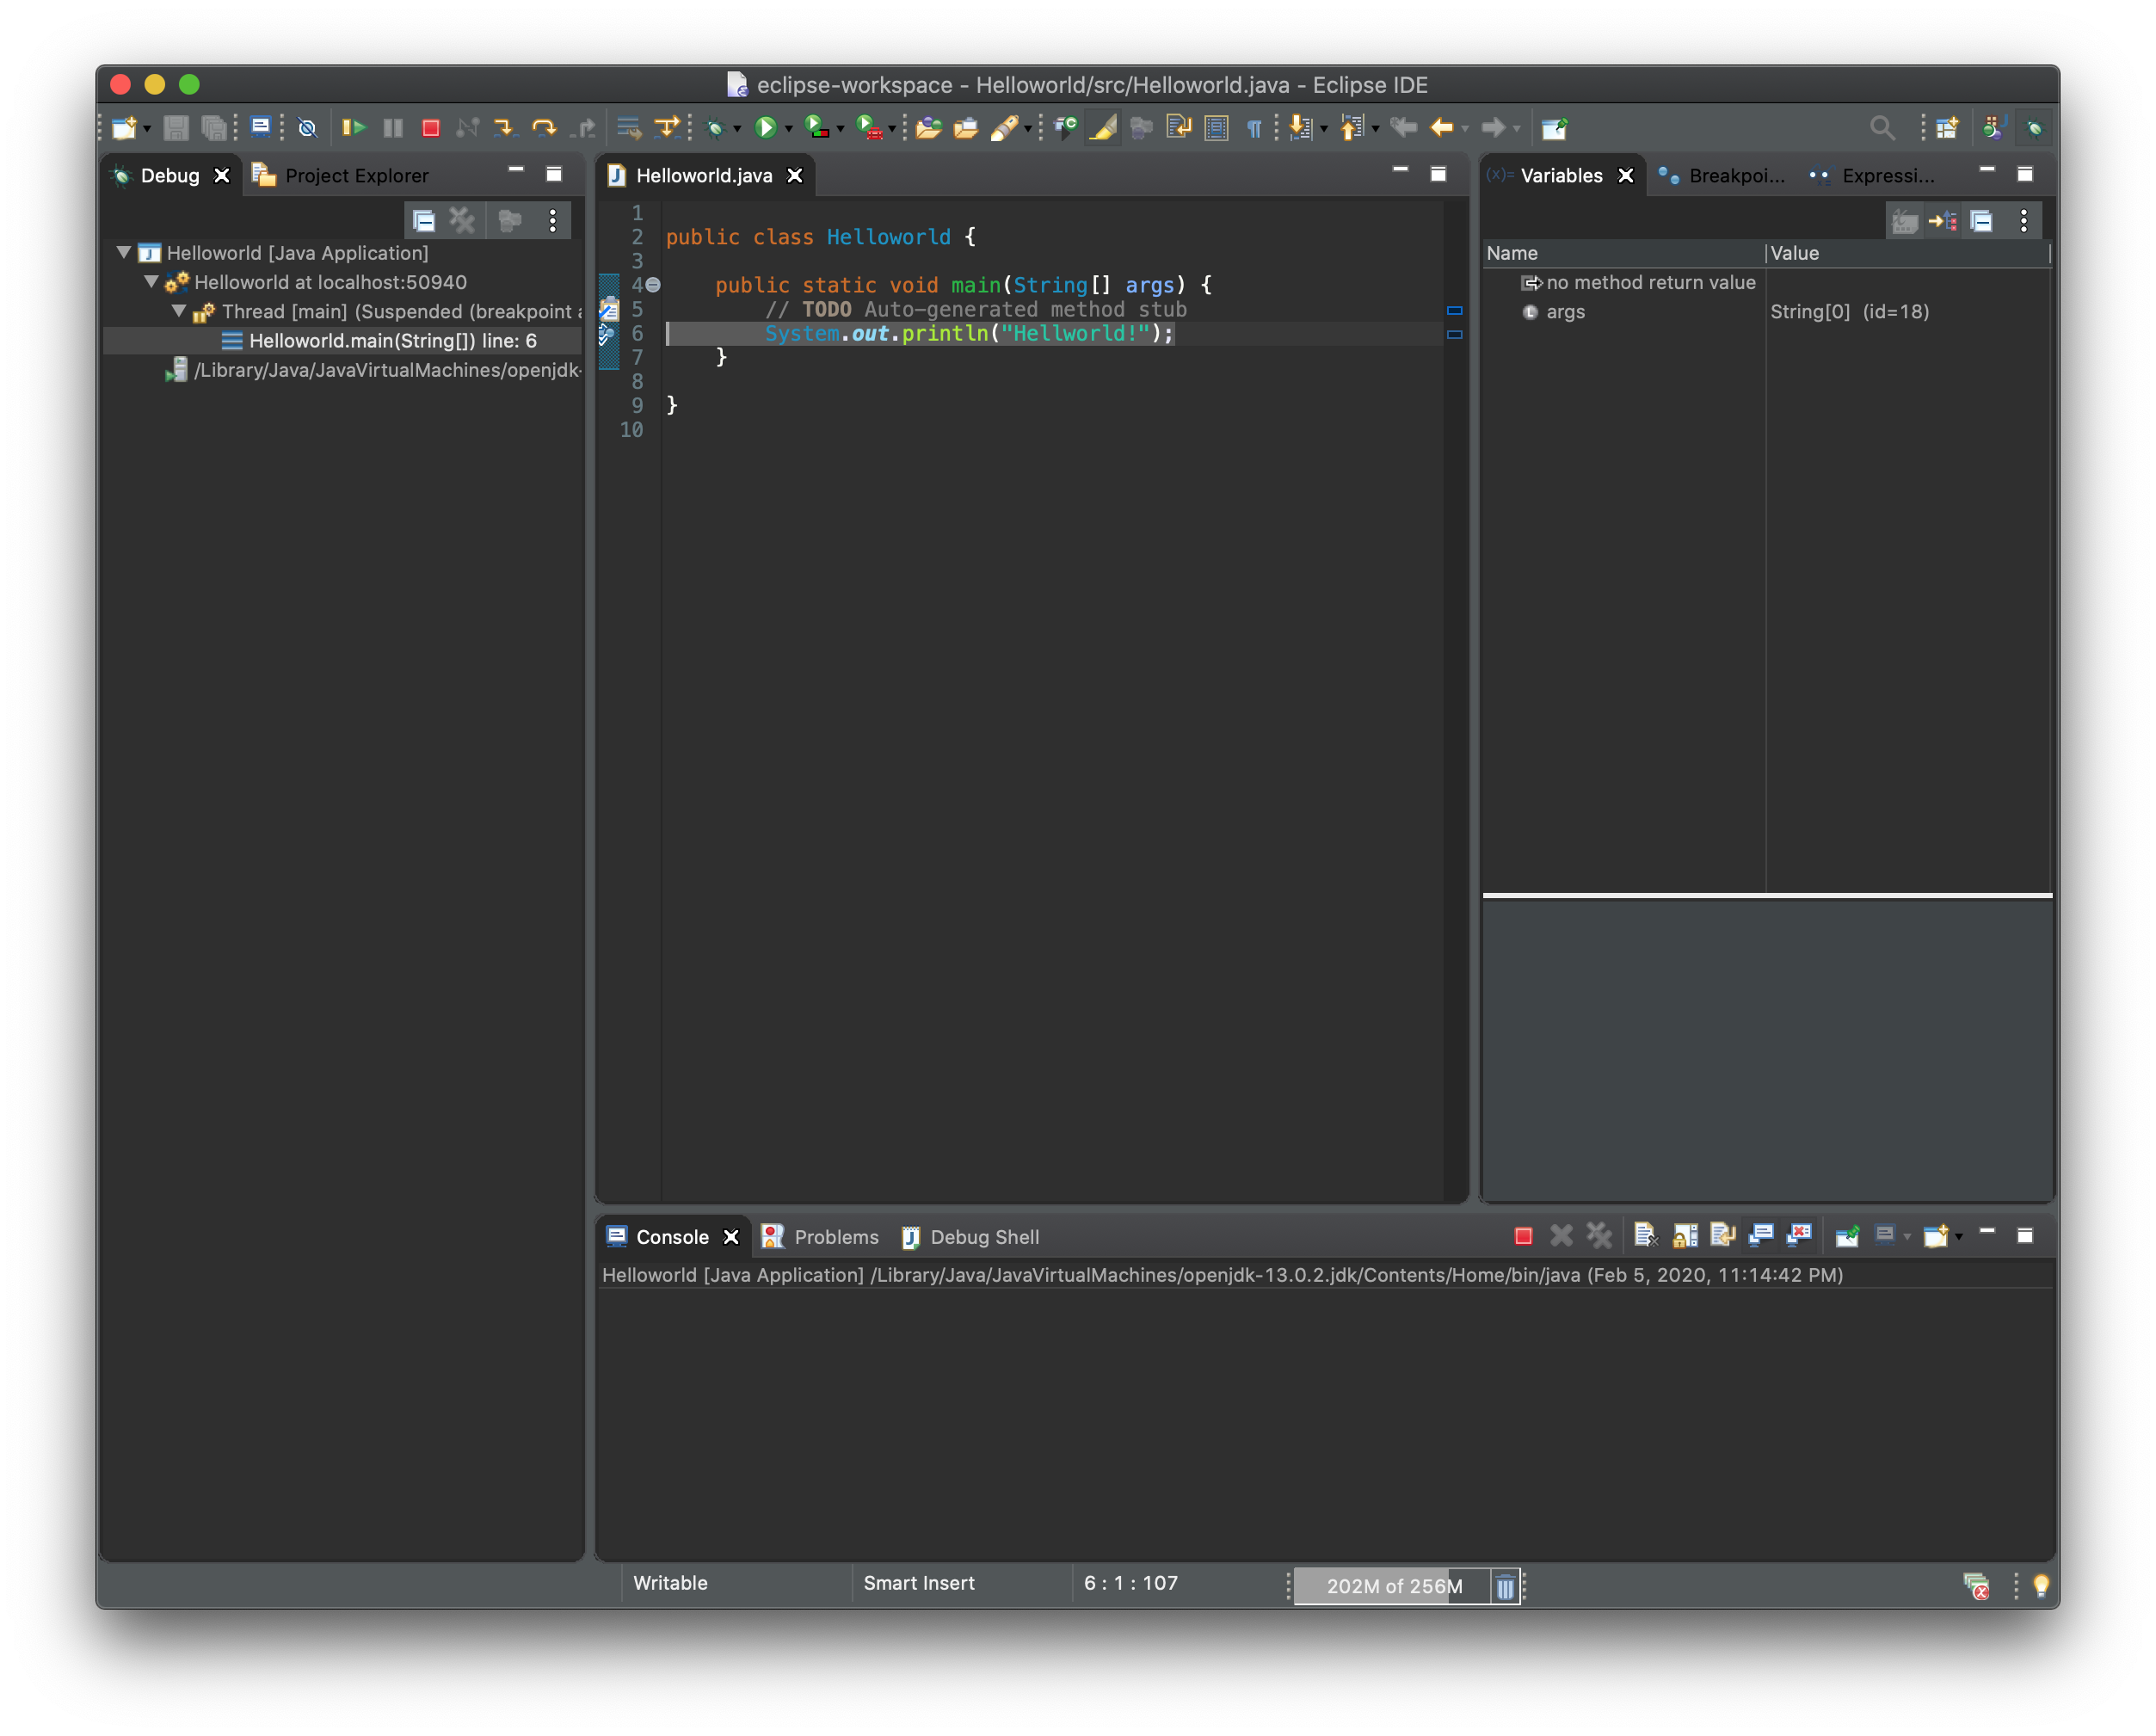
Clicking on the Resume icon will resume the execution.

The following should have appeared in the console of the virtual machine:
lowcomote@lowcomote-VirtualBox:~/workspace$ java -classpath "bin/" -agentlib:jdwp=transport=dt_socket,server=y,suspend=y,address=*:8000 Helloworld
Listening for transport dt_socket at address: 8000
Hellworld!
Debugging a “complex” example running in the VM
In this subsection, we will modify the Helloworld example so that is a bit more complex. Replace the code developed previously by the following:
public class Helloworld {
    public static void main(String[] args) throws InterruptedException {
        int count = 0;
        while(true) {
            System.out.println("Helloworld! " + count);
            count += 1;
            Thread.sleep(1000);
        }
    }
}
Run the example locally, you should get the following result:
Helloworld! 0
Helloworld! 1
Helloworld! 2
Helloworld! 3
Helloworld! 4
[...]
To illustrate how to debug this application, let change the option given to java and use suspend=n. With this option, the execution of the Helloworld program will not wait for the connection of a debugger:
lowcomote@lowcomote-VirtualBox:~/workspace$ java -classpath "bin/" -agentlib:jdwp=transport=dt_socket,server=y,suspend=n,address=*:8000 Helloworld
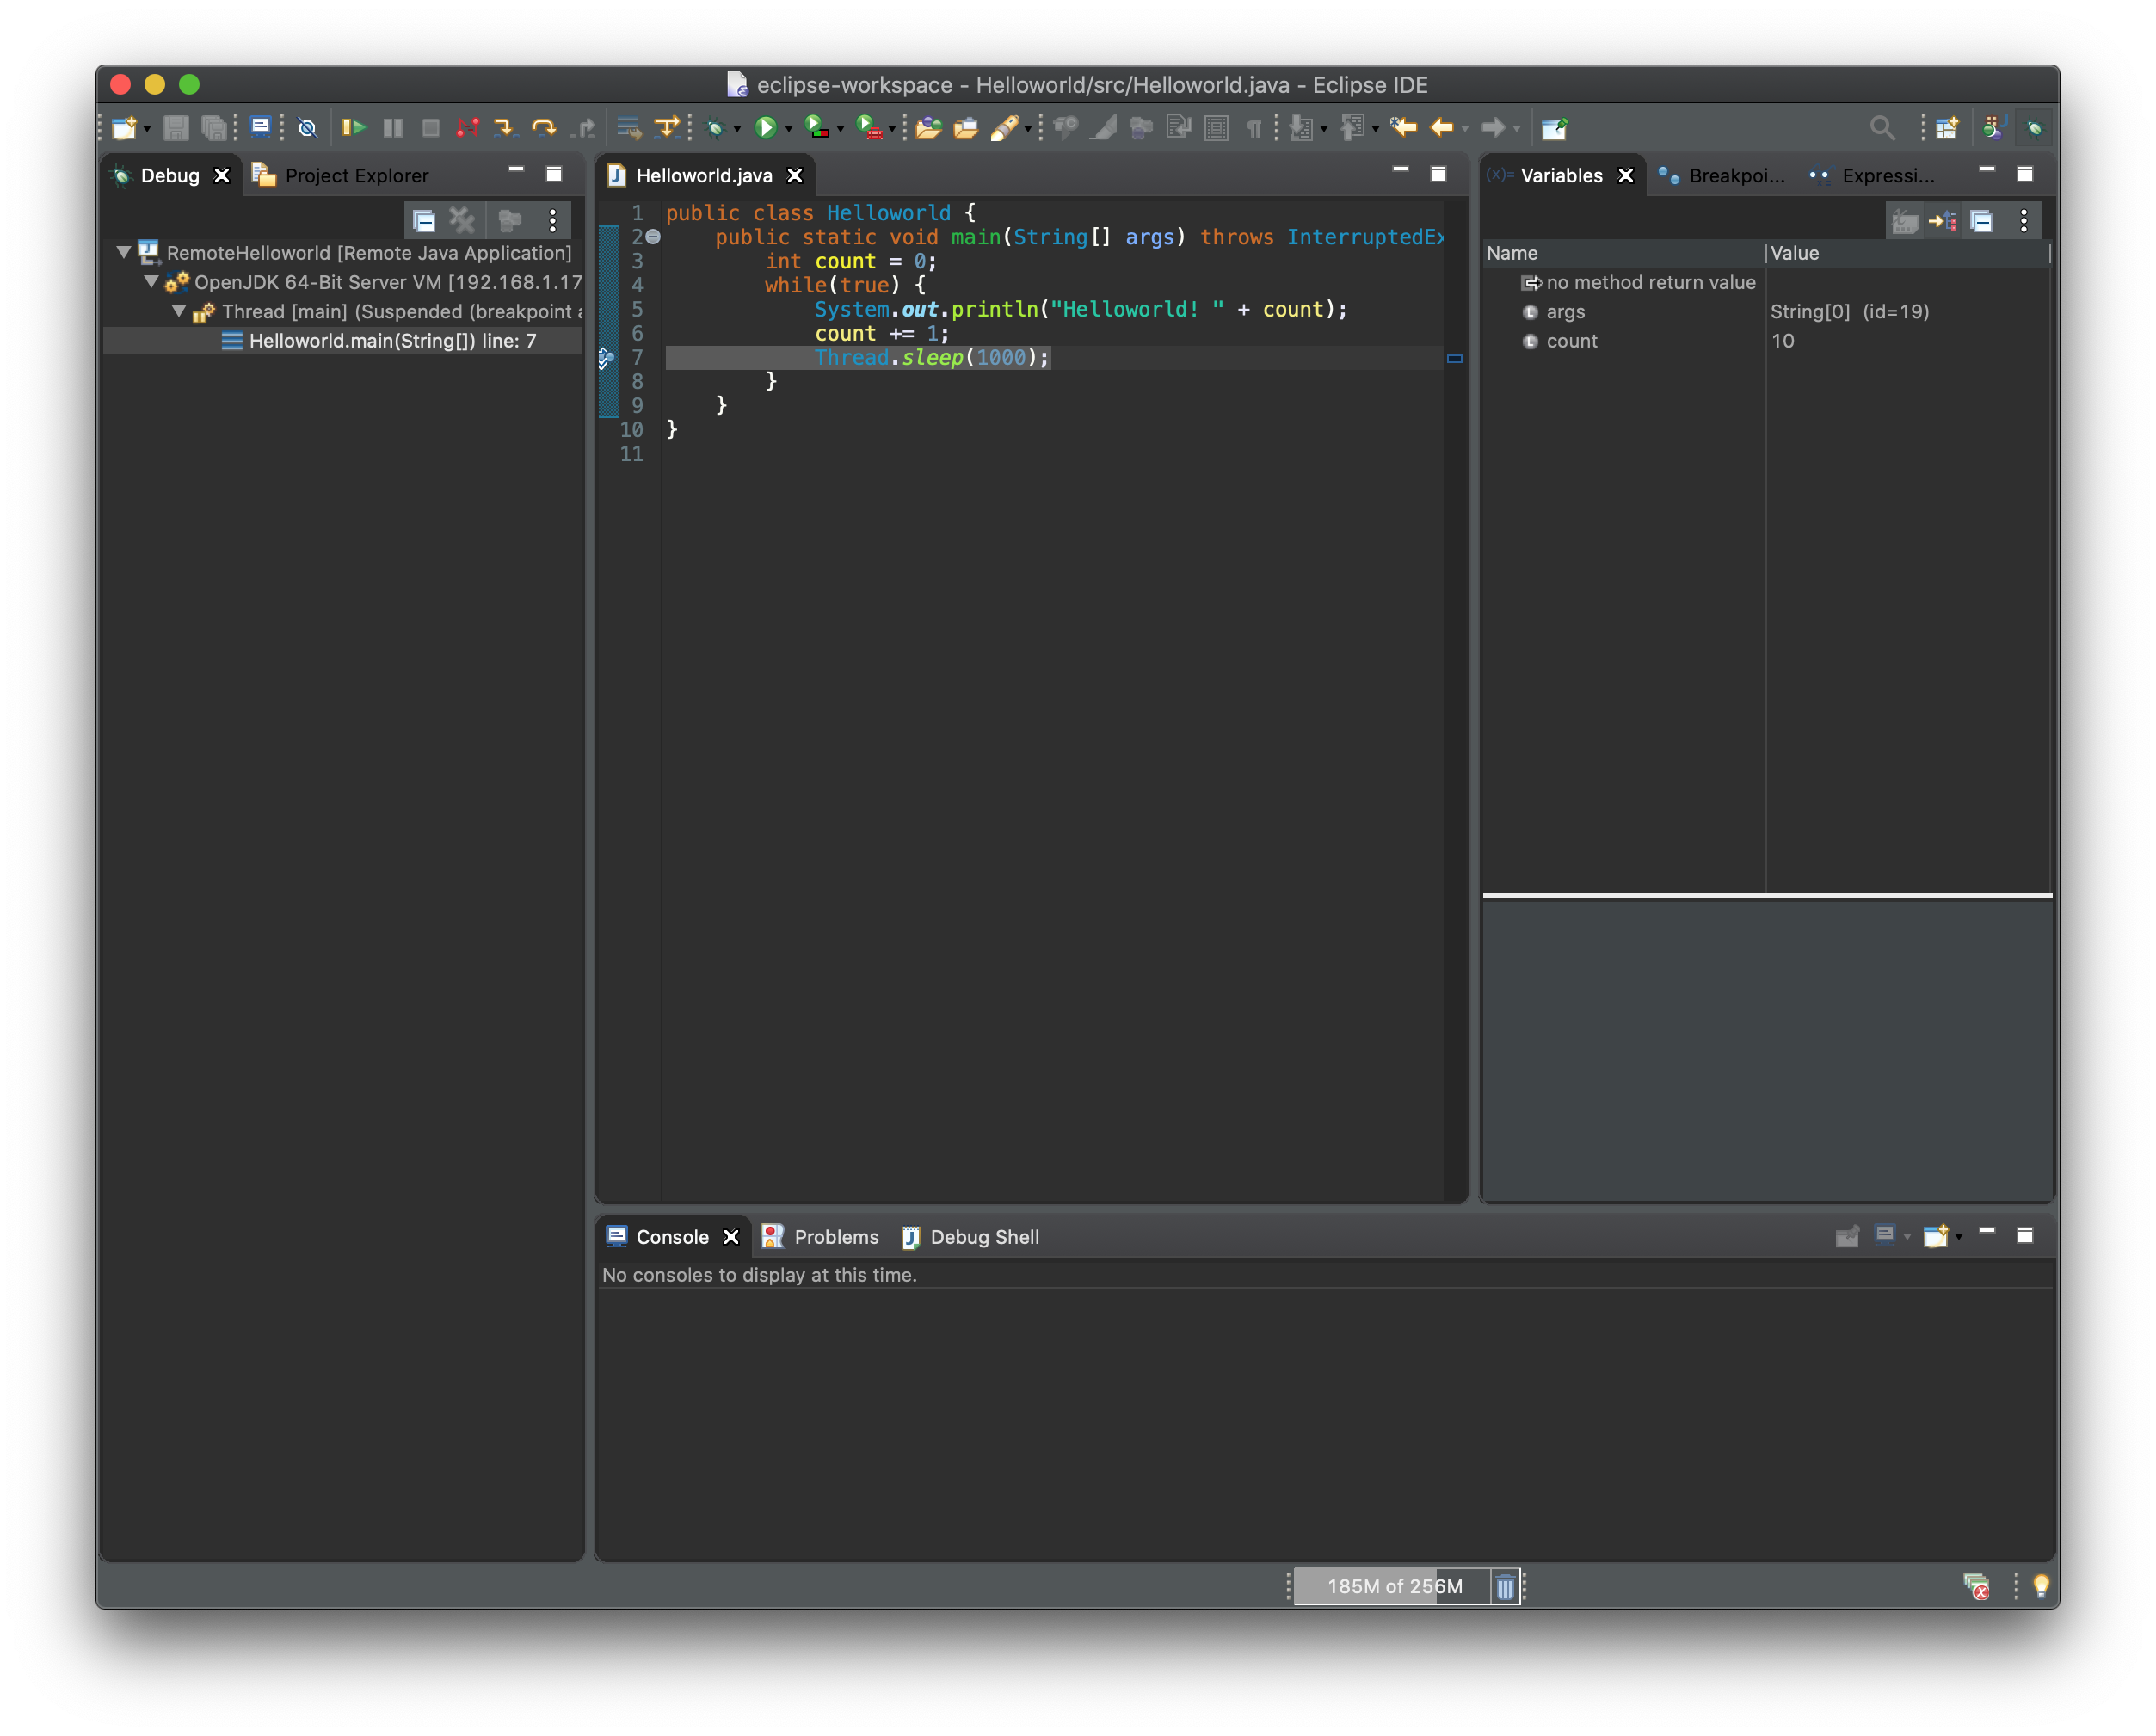
Now, add a breaking point in front of the System.out.println("Helloworld! " + count); instruction. The debugger should quickly stop the execution of the program, and eclipse should show the “Debug perspective” as follow:
Modify the content of the count variable to be 42, as in the following screenshot:
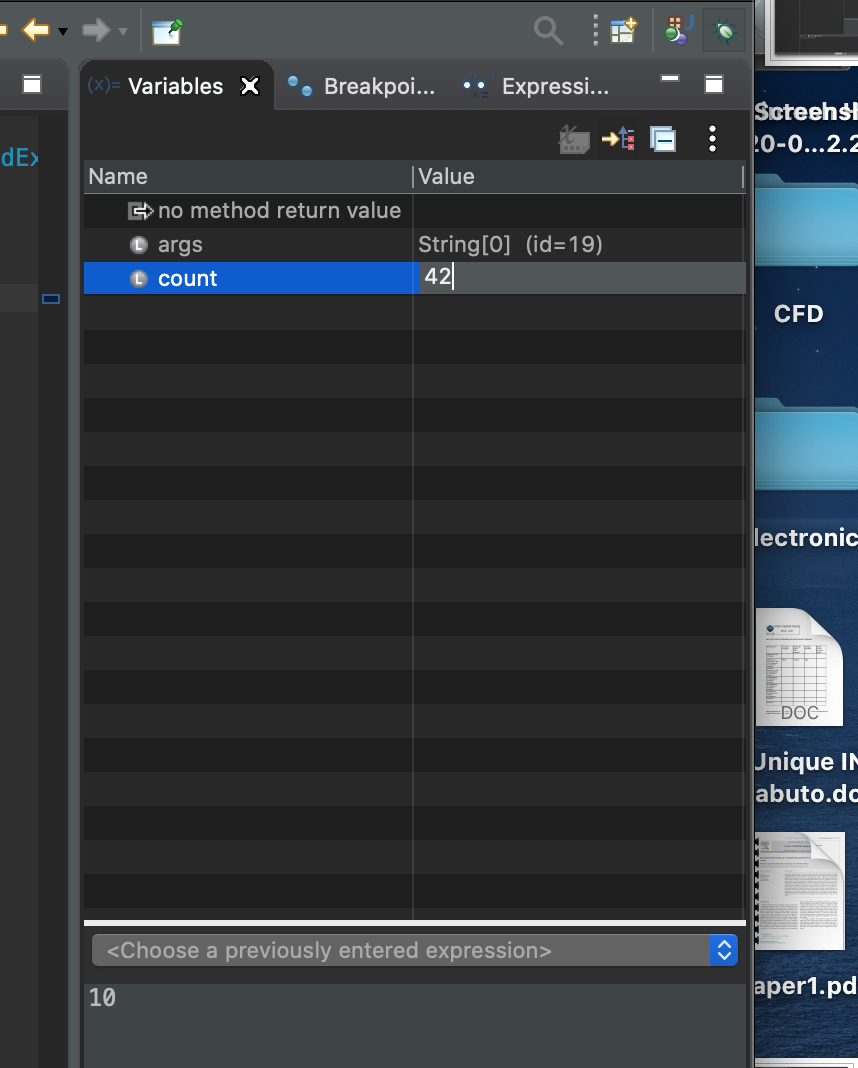
and resume the execution by clicking on the resume button
We can notice that the content of the count variable on the server has changed, as you should get something similar as:
Helloworld! 6
Helloworld! 7
Helloworld! 8
Helloworld! 9
Helloworld! 42
Helloworld! 43
Helloworld! 44
Helloworld! 45